WSS between two rotating discs
November 26, 2021 2021-11-27 5:10WSS between two rotating discs

Two-Disk Simulated Mixer
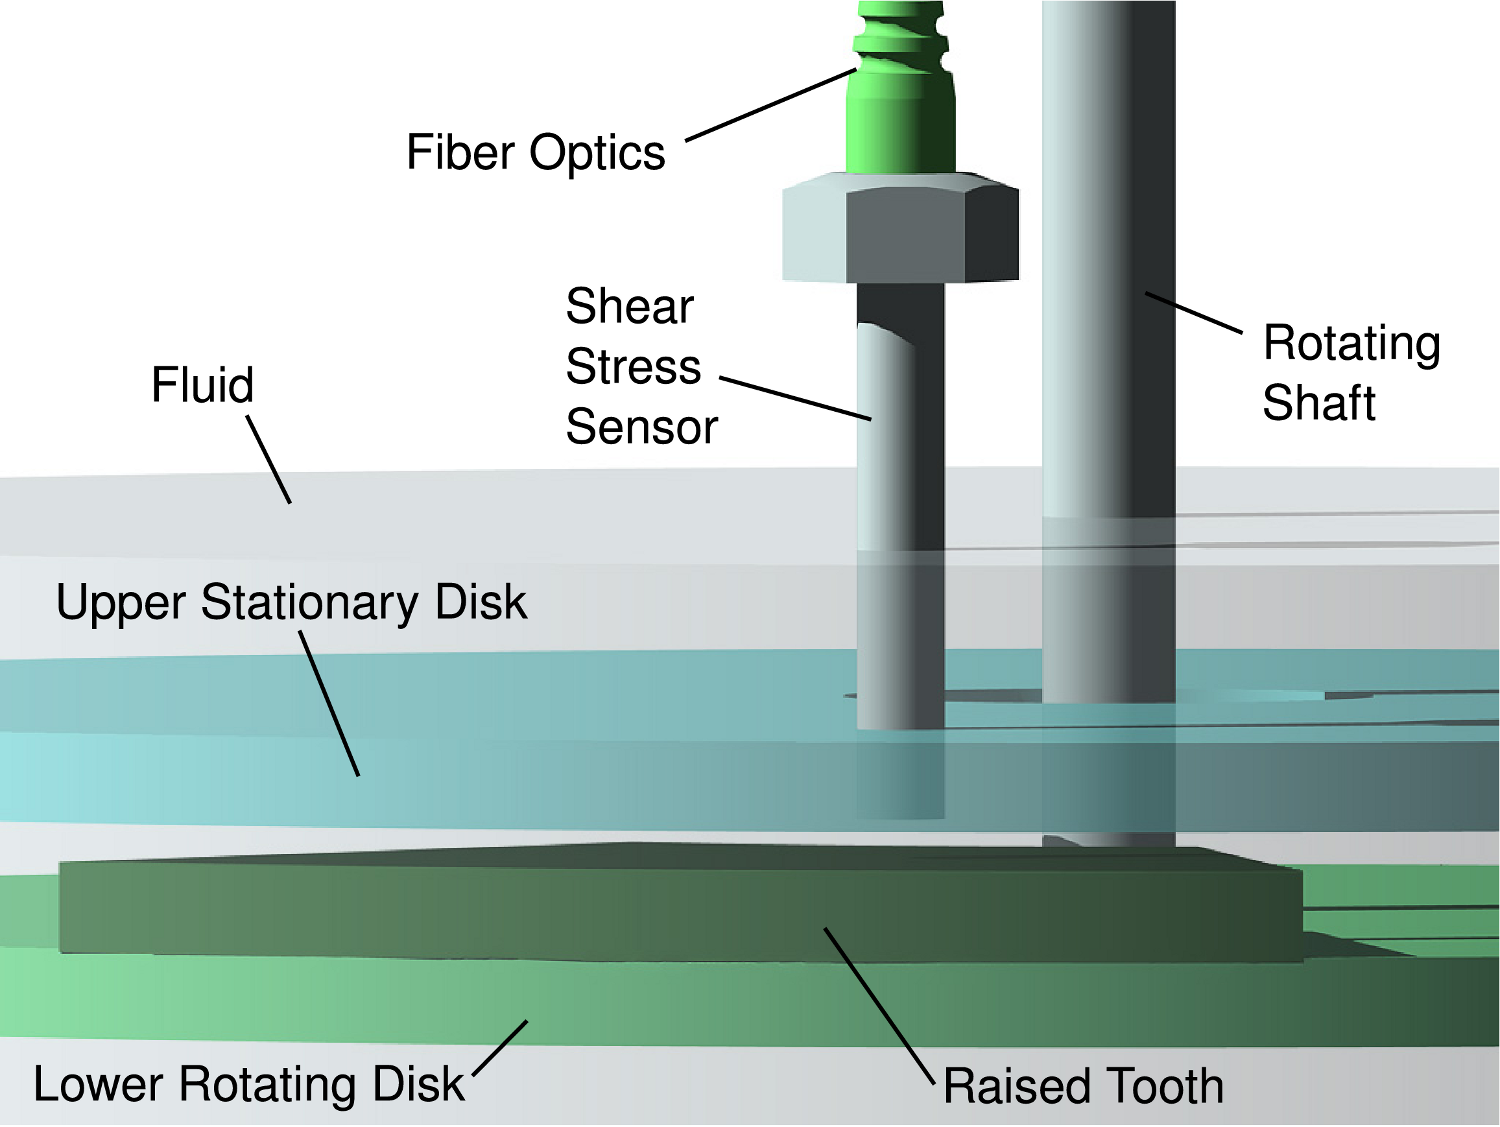
RealShear™ sensors have been tested in a rotating disk experimental setup at Lenterra. The sensor is mounted vertically in a threaded hole in a 9″ diameter stationary disk such that the face of the sensor is flush with the bottom surface of the disk. A second disk is below the first, separated from it by a variable distance (several millimeters), and is attached to a rotating shaft. This second disk has two raised portions (teeth) located opposite from one another on the disk, are 30 and 67 degrees in angular extent, and are 0.9 and 1.2 mm from the upper stationary disk, respectively. The assembly is immersed in a testing fluid which exerts shear stress on the sensor face when the lower disk is rotating.
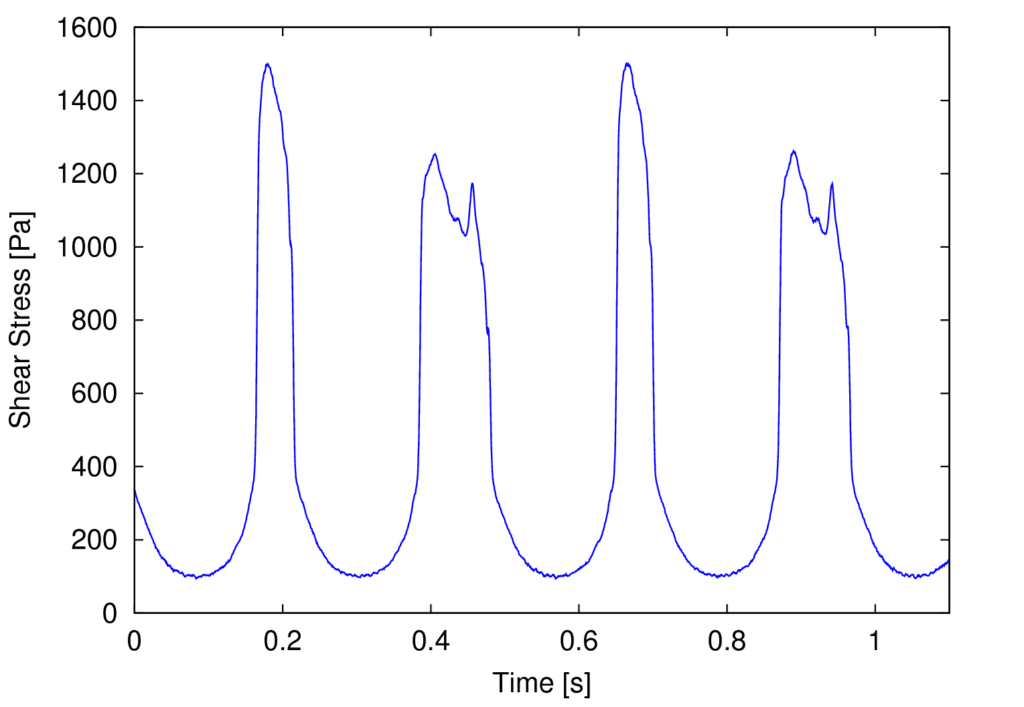
The figure below shows shear stress data measured by the sensor using glycol as the test fluid with the lower disk rotating at a rate of 122 RPM. Two full rotations are shown in which the small and large tooth pass by the sensor twice each. As expected, the smaller gap (0.9 mm) above the smaller tooth results in a stronger peak shear stress (1500 Pa at approximately t = 0.2 and 0.65 seconds) compared with the larger tooth (1200 Pa at t = 0.4 and 0.9 seconds with a gap of 1.2 mm). Note the fine detail captured during the large tooth passes revealing complexities in the fluid dynamics.


